Getting Started
Using the Service
There are three ways to use MOS:
MOS demo: This is a simple way to run MOS locally on your machine to try the service. It runs all MOS components in docker images using docker-compose. It uses development servers NOT suitable for any serious work requiring performance and security. It is just for demo purposes. Instructions for launching the demo can be found here.
MOS cloud: Access and use MOS hosted on the cloud with performance and security features. (Coming soon)
MOS on-premise: Deploy MOS on a private network and servers by working directly with the code repositories.
For help or questions, reach out to us.
Annotating Models
For sample annotated models in various modeling systems, please check out our examples.
Annotating a model code is necessary for informing MOS of the various model components that are important and need to be exposed on the model interface. Annotations have the general form below:
#@ Tag: Name
#@ Key1: Value1
#@ Key2: Value2
#@ ...
Supported tags are the following:
model: Provides the name of the model.
input file: Provides the name of an input files that can be provided to the model.
input object: Provides the name of an input (JSON-serializable) object that can be provided to the model.
helper object: Provides the name of a pre- or post-optimization (JSON-serializable) helper object.
variable: Provides the name of an object representing an optimization variable (or collection of scalar variables).
function: Provides the name of an object representing an optimization function (or collection of scalar-valued functions).
constraint: Provides the name of an object representing an optimization constraint (or collection of constraints).
problem: Provides the name of an object representing the optimization problem.
solver: Provides the name of an object representing the optimization solver.
output file: Provides the name of an output file that the model produces.
output object: Provides the name of an output (JSON-serializable) object that the model produces.
Supported keys are the following:
description: Provides a single-line description for the annotated object. Latex expressions enclosed in $$ pairs are supported.
labels: Provides the name of an object with the same dimensions and structure of the annotated object that provides human-friendly labels for each component.
Deploying Models
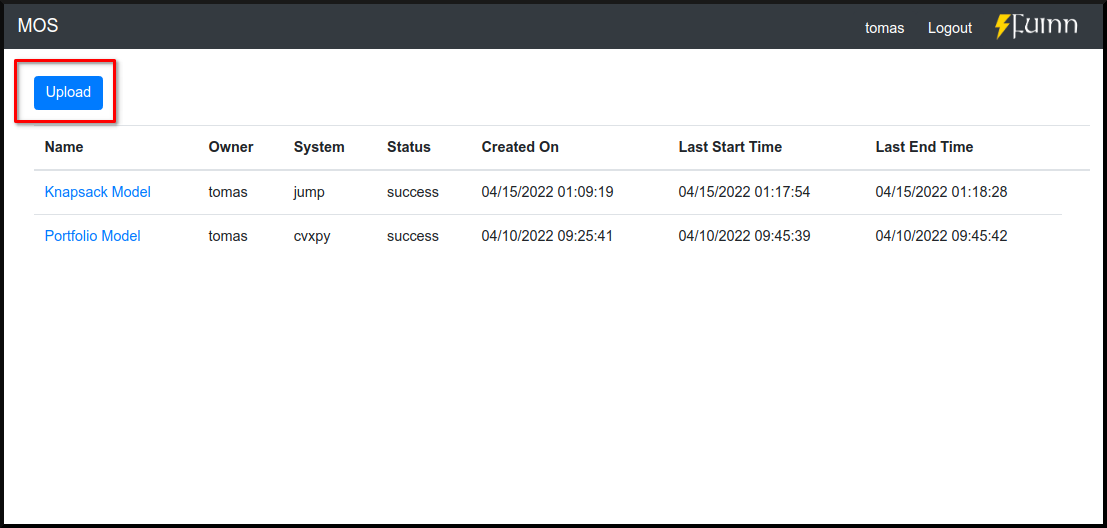
A model can be deployed to the MOS framework via the web user interface or client libraries. Specifically, from the web user interface, the “Upload” button can be used, and then the annotated model file can be selected:
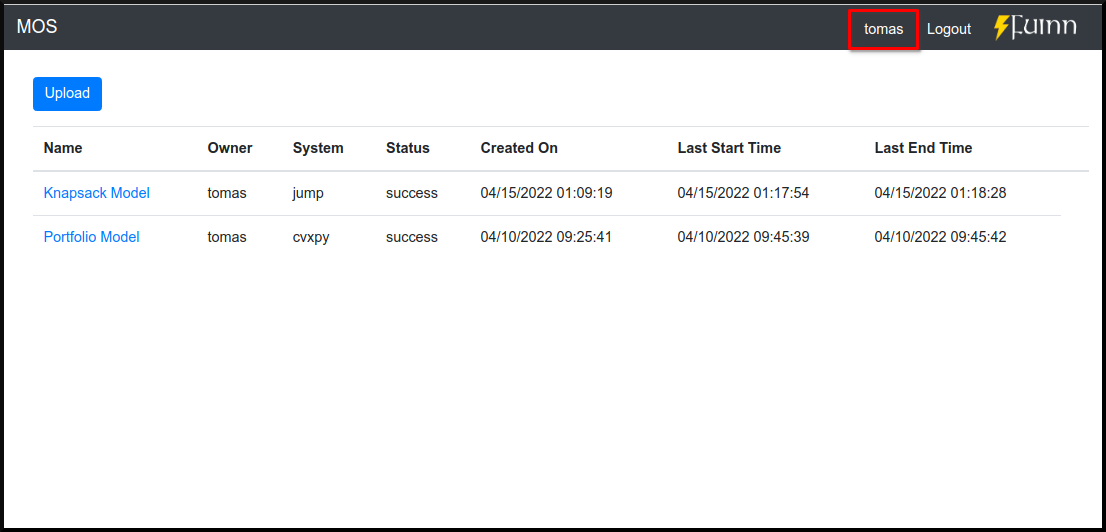
For using the client libraries, the following environment variables need to be specified:
MOS_BACKEND_HOSTMOS_BACKEND_PORTMOS_BACKEND_TOKEN
The token can be obtained from the web user interface, by clicking on the username on the top right corner:
The following code snippets show how to deploy a model using the client libraries after the environment variables have been set:
from mos.interface import Interface

interface = Interface()

model = interface.new_model('path_to_annotated_model_file')
using MOSInterface

interface = Interface()

model = new_model(interface, "path_to_annotated_model_file")
mosctl model new 'path_to_annotated_model_file'
Interacting with Models
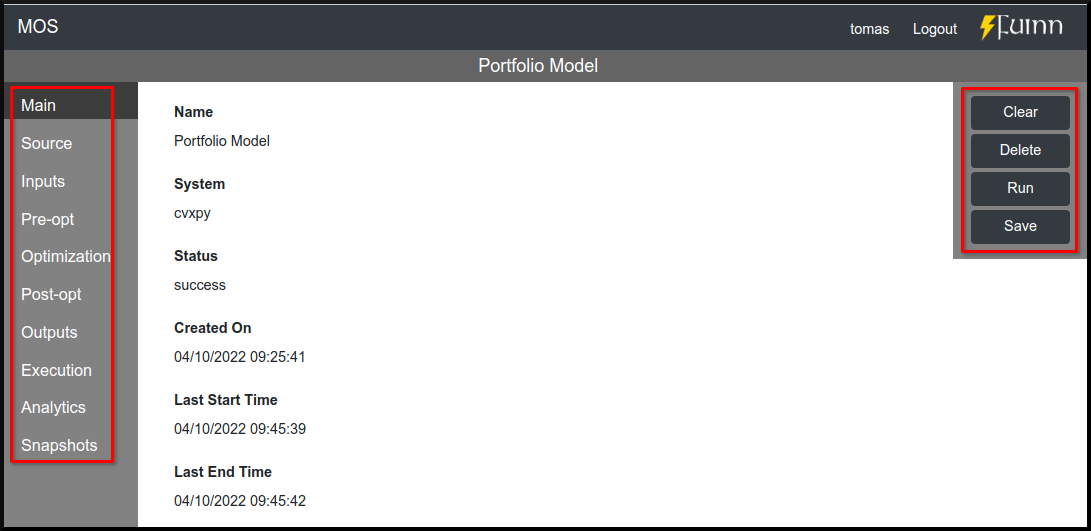
Once a model is deployed to the MOS platform, it can be utilized and analyzed. This involves setting model input files and input objects, running the model, extracting and analyzing optimization results, and extracting model outputs.
In the web user interface, this can be done by clicking on the model, and then using the model menu (left) and actions menu (right):
The code snippets below show how to interact with a model via the client libraries:
from mos.interface import Interface

model = interface.get_model_with_name('Some Model')

model.set_interface_object('object_name', some_object)
model.set_interface_file('file_name', 'path_to_file')

model.run()

print(model.get_status())
print(model.get_variable_state('var_name', 'value'))
print(model.get_function_state('func_name', 'value'))

print(model.get_interface_object('object_name')
print(model.get_interface_file('file_name')
using MOSInterface

interface = Interface()

model = get_model_with_name(interface, "Some Model")

set_interface_object(model, "object_name", some_object)
set_interface_file(model, "file_name", "path_to_file")

MOSInterface.run(model)

println(get_status(model))
mosctl model --name 'Some Model' set-interface-object 'object_name' 'some_object'
mosctl model --name 'Some Model' set-interface-file 'file_name' 'path_to_file'

mosctl model --name 'Some Model' run

mosctl model --name 'Some Model' get-status
mosctl model --name 'Some Model' get-variable-state 'var_name'
mosctl model --name 'Some Model' get-function-state 'func_name'

mosctl model --name 'Some Model' get-interface-object 'object_name'
mosctl model --name 'Some Model' get-interface-file 'file_name'
Monitoring Models
Coming soon.
Saving and Loading Snapshots
Coming Soon.